How to Change or Replace Add to Cart button using Custom Button for a Spacific Category in Woocommerce.
How to Change or Replace Add to Cart button using Custom Button for a Spacific Category in Woocommerce? This question is most common for every WordPress and WooCommerce website user, developer or designer because sometimes we want change the add to cart button to a custom button like “contact us, Read More, Send Enquiry etc.” and we did not know how to change or replace it. Then we check lots of plugins for this type of functionality but some of plugin does not work and some plugin not supported in our website version.
So this post helps everone How to Change or Replace Add to Cart button using Custom Button for a Spacific Category in Woocommerce. Here’s the code below and you can copy it and paste it on your themes function.php file in the last line of your code and don’t forget to remove Php opening (<?php) and closing tag(?>). Use these tags on required places.
<?php
// Change the loop add to cart button by a custom button for specific product category
add_filter( 'woocommerce_loop_add_to_cart_link', 'filter_loop_add_to_cart_link_callback', 10, 2 );
function filter_loop_add_to_cart_link_callback( $button, $product  ) {
    $terms = array('category-slug1', 'category-slug2', 'etc'); // Product categories ( Ids, slugs or names )

    if( has_term( $terms, 'product_cat', $product->get_id() ) ){
        $button = contact_us_replacement_button();
    }

    return $button;
}

// Change single product  add to cart button for a specific product category
add_action( 'woocommerce_single_product_summary', 'action_single_product_summary_callback', 1 );
function action_single_product_summary_callback() {
    global $product;

    $terms = array('category-slug1', 'category-slug2'); // Product categories ( Ids, slugs or names )


    if( has_term( $terms, 'product_cat', $product->get_id() ) ){

        // For variable product types
        if( $product->is_type( 'variable' ) ) {
            remove_action( 'woocommerce_single_variation', 'woocommerce_single_variation_add_to_cart_button', 20 );
			remove_action('woocommerce_single_variation', 'woocommerce_template_single_price', 30 );
            add_action( 'woocommerce_single_variation', 'contact_us_replacement_button', 20 );
        }
//         For all other product types
        else {
            remove_action( 'woocommerce_single_product_summary', 'woocommerce_template_single_add_to_cart', 30 );
			remove_action('oocommerce_single_product_summary', 'woocommerce_template_single_price', 30 );
            add_action( 'woocommerce_single_product_summary', 'contact_us_replacement_button', 30 );
        }
    }
}
// The Function for "Custom Button" replacement
function contact_us_replacement_button(){
    $text = __( "Please Call Store", "woocommerce" );
    // Output
    echo '<a class="custom_call_button" href="#">' . $text . '</a>';
}
?>
Hope this article helps you “How to Change or Replace Add to Cart button using Custom Button for a Spacific Category in Woocommerce.” and You can share this article with your friends so that they not stuck in making this type of functionality.
How to Increase Website Loading Speed and Performance
Website speed and performance are very important for website traffic so that your website can rank on google first page. For example, if you search something on google search then you click on any one of the websites on google search result page.
Then you wait a few seconds for website loading and when it takes more time then you close the website and click on the next website on google search page result. This process runs again and again until the website opens fast and doesn’t take more time in loading.
Best Ways to Increase WordPress Website Loading Speed and Performance
- Check your Website Speed and Performance
- Increase website loading Speed & performance using W3 Total Cache Plugin.
- Optimize and Resize Website Images
Check your website speed and performance
First, you have to check your website speed and performance on GTmetrix or Pingdom Tools and many more website but GTmetrix is a must for testing website speed and performance because GTmetrix is very good for providing website speed and performance data.
Gtmetrix also provides an optimized version of our website images and shows the serve scaled images of our website which is not resized on our website. GTmetrix also shows serve scaled images resolution which is best for images on our website.
So copy your website URL and then paste the URL on the GTmetix website in the enter URL to Analyze section. Then click on test your site button on the right-hand side of the site. Then GTmetrix provides website page speed and performance data.
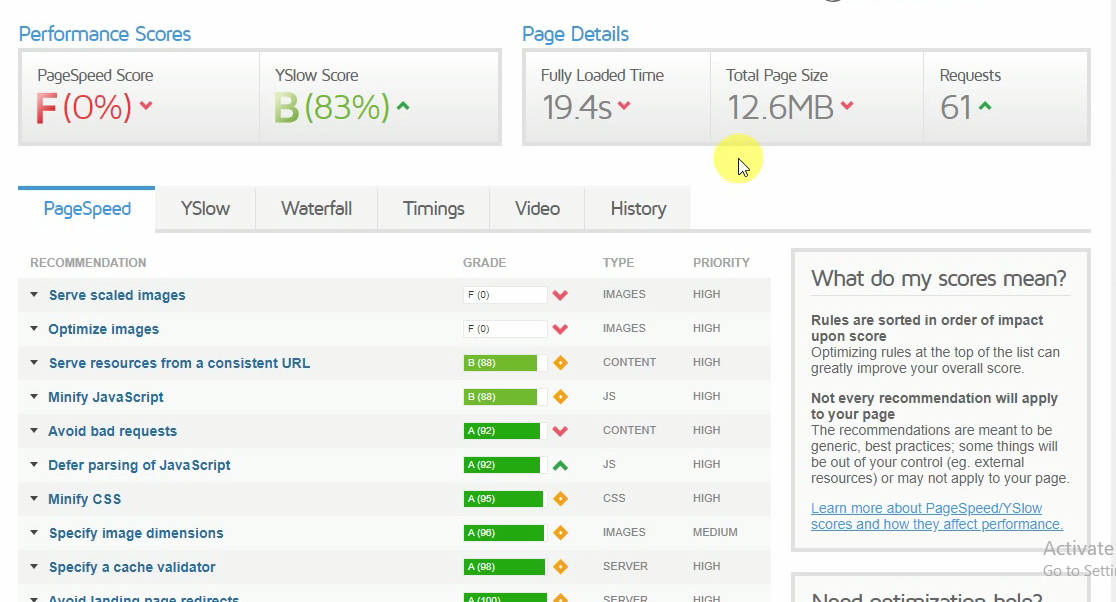
Website Speed and performance data on Gtmetrix
Increase Website Loading Speed Using W3 total cache plugin
Website loading at slow speed is very harmful to website ranking on google. So, after checking the website speed and performance then download and install the w3 total cache plugin on your website. Then Configure the w3 total cache plugin and after configuring the plugin re-check your website on Gtmetrix.
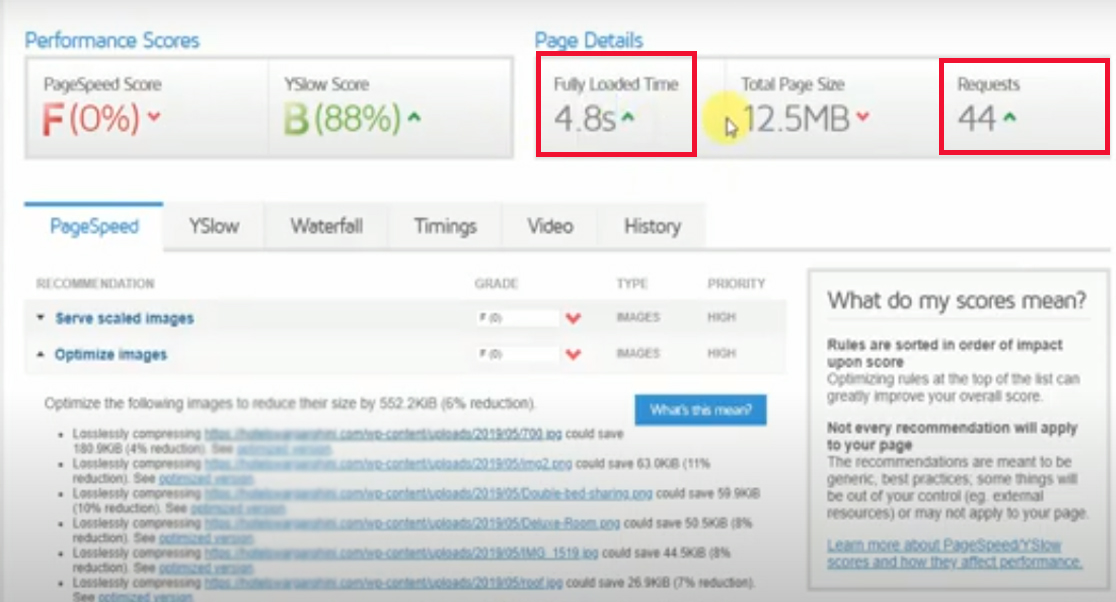
So, then you show the result of your website, and the full loading time 19.4 seconds is reduced in 4.8 seconds and the request also reduced 61 to 44 after configuring the W3 Total Cache plugin.
Optimize and Resize Website images and Boost Website Speed & Performance
Image optimization and image resizing are must for speed up any website and it’s performance because big size image takes a very long time to load and then the website page also takes a very long time in loading.
Resize and Upload all Serve Scaled Images
So, after W3 Total Cache configuration and re-checking website speed and performance, go on the Serve Scaled images on PageSpeed section in GTmetrix and then open all image by clicking on the image link and download them then resize all images in given resolution ( like 1280×720 to 360×220 ) on Serve Scaled images and save all images in your PC or computer same as the original name.
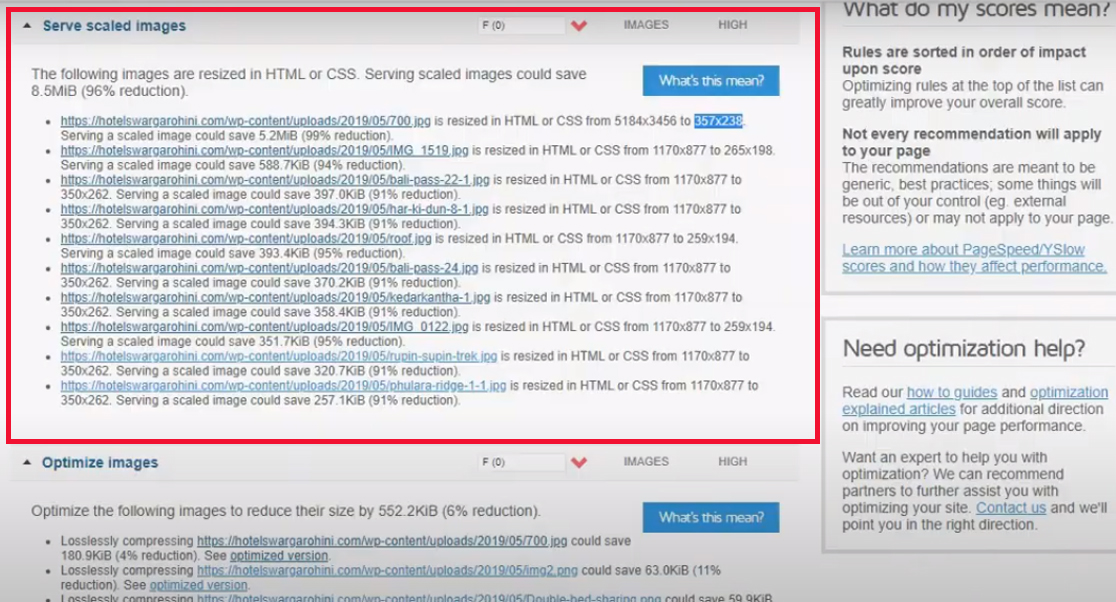
Before resizing Serve Scaled Images
Then open your hosting panel or install the WP File Manage Plugin for image uploading on your site. Then upload all images by following the same path on Serve Scaled Images and you can upload all images by drag and drop and then all images replace by resized images. Then you can check your website speed and performance again on GTmetrix.
You can see the result of website speed and performance, the Website Page Speed Score change 0% to 63 % after resizing all Serve Scaled Images and Total Page Size change 12.5 MB to 4.39 MB.
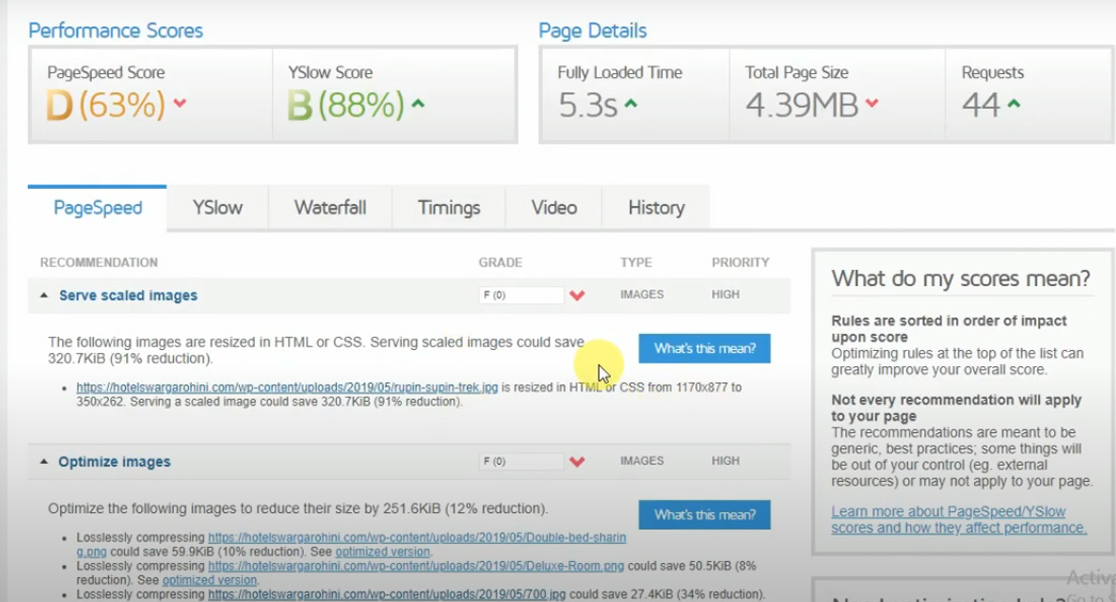
After resizing all Serve Scaled Images
Download Optimize Version of all Images and Upload Again on Your Website
After that go on the Optimize Images and open the optimized version of all images and save all images on your PC or computer the same as the original name. And upload all images on your site by using the WP File Manager plugin or your hosting panel for image uploading the same as the Serve Scaled Images.
So, when all images uploading complete, then refresh your website by clicking Ctrl + F5 or purge all cache by clicking on top header performance menu in your WordPress Website admin dashboard. And then check your site again on GTmetrix.
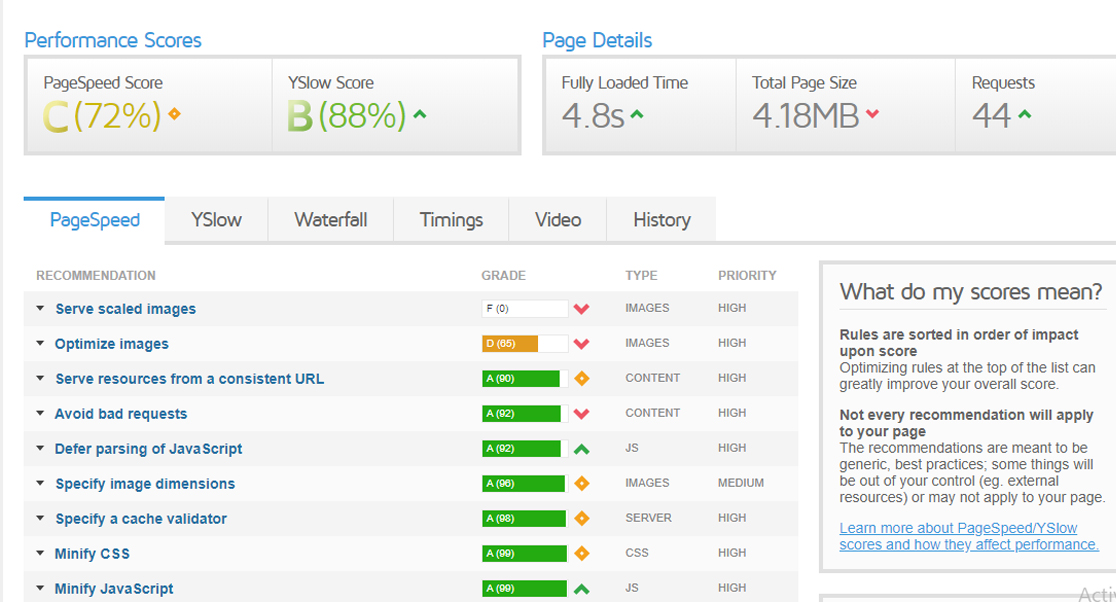
After Optimizing all Images on GTmetix
Then you can see the result of your website on GTmetrix. The Page Speed Score changed 63% to 72% and Total Page size changed from 4.39 MB to 4.1 MB and the website fully loaded time is 4.8 second.
So, now you will all understand how to increase website loading time and how to reduce the total page size of your website. You also know here about how to resize website images and how to optimize website images without a plugin.

